Showing posts with label Carolyn Lakin. Show all posts

Thursday, 3 January 2019

Happy New Year


Happy New Year to you all!

Hope you've all had a wonderful Christmas and New Year whatever you've been up to. Here's to a happy, healthy and crafty 2019. Hope you're looking forward to more fabulous products from IndigoBlu. I'm sure Kay and Alfie will delight you with what's in store. In the meantime here's my quick make for the New Year.


I made a start using the Ink Smooshing technique. The Distress Oxide was pressed onto my Glass mat and spritzed with water. I then dragged my watercolour card through. 


Each colour was dried before adding the next so the colours stayed true and didn't create a muddy mess. 


The colours were added in the following order - Picked Raspberry, Spiced Marmalade and Wilted Violet. Once dried drips of water were flicked onto the page and dabbed with kitchen roll to lift the colour.


Using the circle and barbed wire border from the Skullduggery Borders A5 Stamp Set this was inked with the Picked Raspberry.


Part of the stamp was used to make a second print using Wilted Violet and offset from first stamp. The words were taken from the Mindfulness #1 stamp set and stamped in Versafine Clair Charming Pink


The numbers were stamped onto a second Smooshed sheet in Charming Pink and then cut out and mounted onto pink cardstock. Happy New Year was written with a White Posca pen also on pink cardstock and cut out.


The card was then assembled with the numbers across the middle of the card and the Happy New Year placed beneath the 2019. The Smooshed watercolour card was mounted onto a pink card blank. Finally white highlights were added using the White Posca pen.


Thank you for stopping by and once again Happy New Year!

Happy Crafting

Carolyn
x


Thursday, 4 October 2018

Worker Bee Paperweight


Good Morning,

Carolyn here with you today sharing something I made a while ago. I wasn't able to share at the time as I used a stamp that hadn't been launched.So here goes.....

Firstly I selected a large pebble from the garden which was a suitable shape for a paperweight.


I gave it a coat of GeeSso Good White then sponged randomly with Duck Egg. Collectors Edition Number 16 Letters were randomly stamped in Steam Whistle.


Several Bumblebees  and  Journal Signs were stamped with black Versafine onto Rice Paper


These were then torn around so the edges weren't prominent when adhering to the pebble. The Bumblebees were painted with Lemon Meringue acrylic paint.


A coat of Slap It On was painted on the pebble to seal it.


To finish Fabric Sparkles were added to the Bumblebee wings.


This now sits on my desk taking pride of place and reminds me of the summer. Do you have an IndigoBu stamp that reminds you of the summer now that Autumn has arrived? 

Also have you seen the new challenge over on the 'I Love IndigoBlu' (unofficial) FaceBook page? We'd love to see what ideas you create for this challenge!

Enjoy your day!

Carolyn 
x


Friday, 7 September 2018

Halloween Launch


Good Morning,

Carolyn here with you today and I'm sharing something new that will be launching later this month. Be sure to join Kay on Friday 21st September at 4pm on Hochanda to see these fabulous new designs. The DT are thoroughly enjoying making their spooky samples for the show. Thanks to Sue for the image below.


My idea was to use all the stamps and create a simple one layer card so I'll take you through a step by step of how I made this.


The first step was to decide how much of the card to mask. I used the 'Rule of Thirds' to help me position my stamped images. If you've not heard of this before it has been used by artists and photographers for centuries.It is considered a basic yet essential guideline to help compose an image and decide where to place the subject to create a well balanced image. The basic principle is to divide the card into 9 sections, 3 across and 3 down and where these intersect would be the strongest focal points


As I only wanted to divide my card vertically I masked my card on the dotted lines and I would stamp my images between these masked areas. I chose to stamp Batty first in the bottom left corner using my stamp platform.


Next I stamped Clarice the Giant Moth using Black Versafine in the top right corner. Both these were also stamped onto Post It Notes and cut out to create masks.


I then wanted the Skull to appear in the background so the masks were placed over Clarice and Batty before stamping the Skull.


The final stamp I used was the 'Cracked Glass' which also looks a little similar to a spiders web. So after creating a mask for the skull I free stamped the Cracked Glass in the blank areas.


The image below shows the stamped images after all the masks have been removed.


I had planned to leave it black and white but decided to give it a little colour. As it is for Halloween I decided to use Leather Corset and Burning Bonfire. These were watered down to give a muted effect plus I didn't want to lose the effect of the stamped images. I also drew a line either side of the images to define the edge and added a few zig-zags to break it up.


The final piece was matt and layered onto brown card an then onto an orange card blank.


I do hope you found this step by step useful and be sure to join Kay on the 21st to see what the rest of the DT have produced with these fantastic designs.

Have a wonderful day

Happy Crafting

Carolyn
x


Thursday, 2 August 2018

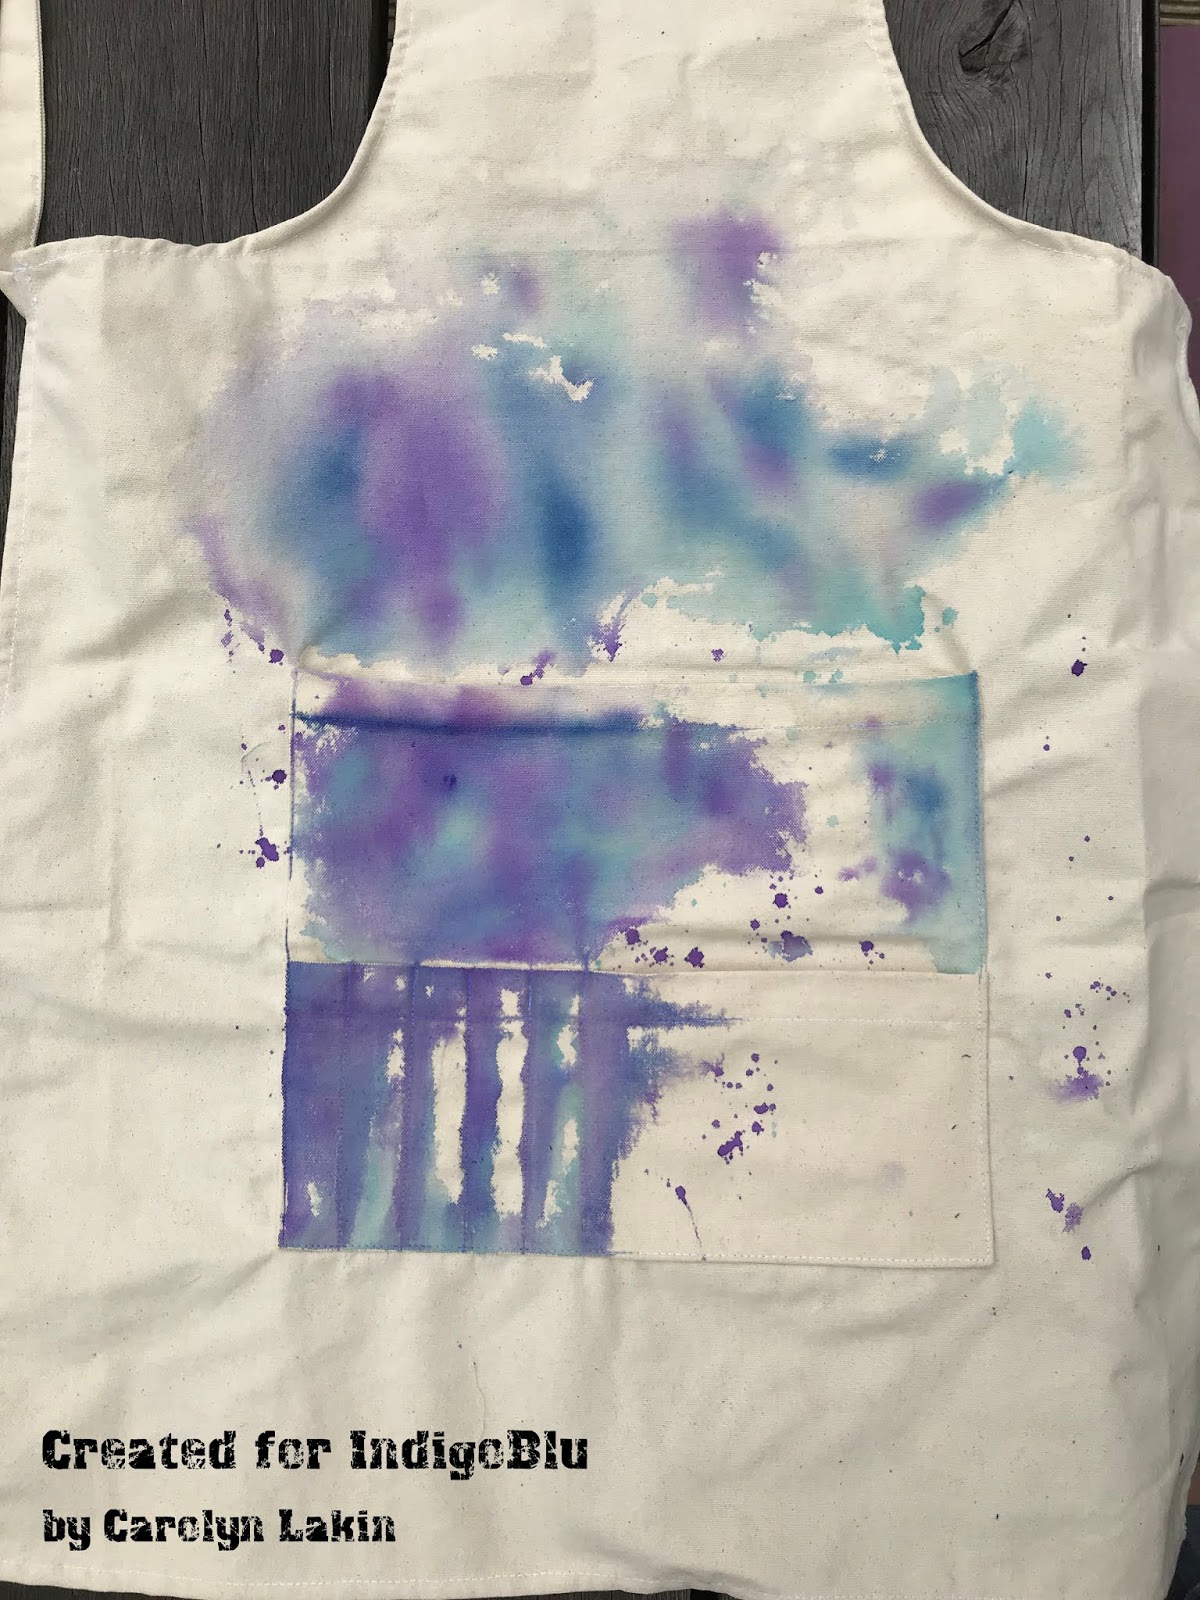
IndigoBlu Apron


Morning, Carolyn here with you today so I thought I'd share my photos of my apron and how it came together as it was such a HUGE success last month.

I decided to stick with blues and purples for this and started by spritzing the apron with water to make the colours move.


Then I cut the Artists Fabric Panel into the various sections and played around with the positioning until I was happy with the layout. To add further interest I added an extra pocket from a pair of old denim jeans. 


I stuck with the same colours for the sections from the panels which I think were Indigoblu, Townhouse Teal and Stroke of Midnight. My memory isn't great and as I wasn't planning to write about this I hadn't written down what I used, big mistake!


The photo below shows the main focal panel stitched to the left hand side with part of a zip and I also used some of the fancy stitches on my sewing machine to attach other sections.


I also used some of the Art Studio A5 stamp set and stamped the images onto tissue paper and used fabric Slap It On to adhere them.


Below is the finished apron followed by a couple of close ups.


Hope you enjoyed Kay's shows and were inspired to purchase and decorate your own aprons. It would be lovely to see your finished projects so please do share on the I Love Indigoblu Facebook page for us all to see.

The next show on Hochanda is this Sunday with the fabulous Lou Withers. So please do tune in to see the launch of more fantastic products. They are Amazing, Awesome and NOT to be MISSED!!

The DT have done themselves proud and have started sharing their fabulous pages on Facebook and Instagram. Please do pop by to take a look and don't forget to tune in on Sunday.

Happy Crafting

Carolyn
x

Thursday, 7 June 2018

Floral Fantasy Box


Good Morning,

Hope you're all enjoying the good weather we've being having recently. 

Today I'm sharing a project I made some time ago using the Fantasy Floral stamps. The Buddleia is a gorgeous flower that attracts butterflies and this is why it's commonly known as the Butterfly Bush. 


Materials

MDF box
Indigoblu Stamps - Floral Fantasy, Rugged Edge
Stazon Black & Vibrant Violet
IndigoBlu acrylic paint - Lime Marmalade, Coastal Walk, Wimberry Pie, Aladdin 
IndigoBlu Stencils - Laurel Leaves & Texture
IndigoBlu White Gesso
IndigoBlu fine paste
IndigoBlu Slap-it-on Gloss
IndigoBlu Diamond glaze
IndigoBlu stamping card
Seed beads


Divide an A4 card into 4 sections to create the background for the sides of the box and paint with the
Lime Marmalade, Coastal Walk and Wimberry Pie. 


Apply white Gesso with a palette knife to create texture and lines and add Lime Marmalade through the Texture stencil. 


Stamp the butterflies and the lilac flower in Violet and Black. Create circles using the top of a water mister bottle dipped in white Gesso. Cut each section into 92mmx36mm for the box side and 92mmx19mm for the lid side.


Create another background (94mmx94mm) for the lid of the box using the same colours as before and stamp the lilac flower in Black. Stamp an additional flower using Wimberry Pie, cut out and decoupage the main image. Apply fine paste through the leaves and circle Texture stencil. 


Use Slap It On to adhere beads randomly to the lilac flower. Stamp a border to the lid background with the Rugged Edge Stamp. Stamp two small butterflies one in Violet and the other Black and paint with Wimberry Pie and Aladdin. Cut out and adhere to the box lid.


Using Slap It On adhere all the backgrounds to the sides of the box and lid. Randomly apply Korma Crackle. Once its dry paint the inside of the box with Aladdin and stamp a butterfly using white Gesso to the inside of the base and lid. Finally apply Diamond Glaze to the top of the box to encase the beads and give it a gloss finish.


Thank you for stopping by and please do leave a comment. It's great to hear from you.

Happy Crafting

Carolyn
x