Wednesday, 25 April 2018

Marker Storage

Hello dear reader,

As we all have, a marker problem.
Still it isn't a real problem, yeah.

So I have made this storage from an empty tin can..


Playing with shaving foam and ecoline. 


First cut a piece of paper 2cm bigger than the diameter from
the can.
Spray the shaving foam on a craftsheet, 


Drip several colors ecoline ink in the shaving foam. 


Twist the ink with a tooth pick.


Press the paper in the shavig foam with light pressure.


Clean the paper with a pallet knife and paper towels


Stamp in different colors the beuatiful IndigoBlu stamps.
I use in the background 

After you finished stamping glue the sheet on the tin can.
And your marker storage is ready.

Hope to inspire you.
Big hugs


Thursday, 19 April 2018

Stamp Focus | Building A Wreath with Marigold And Peony

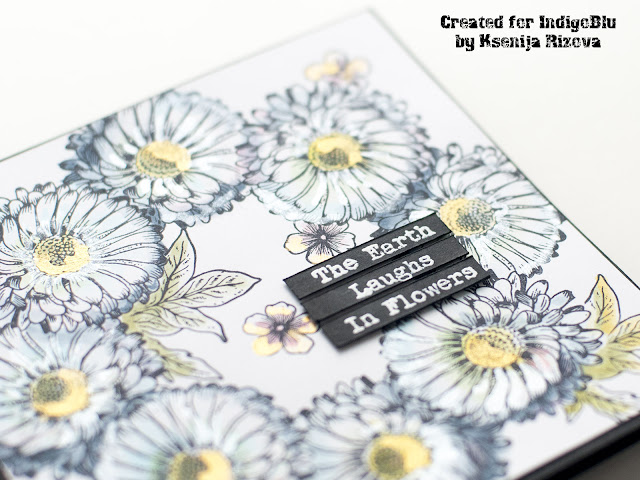
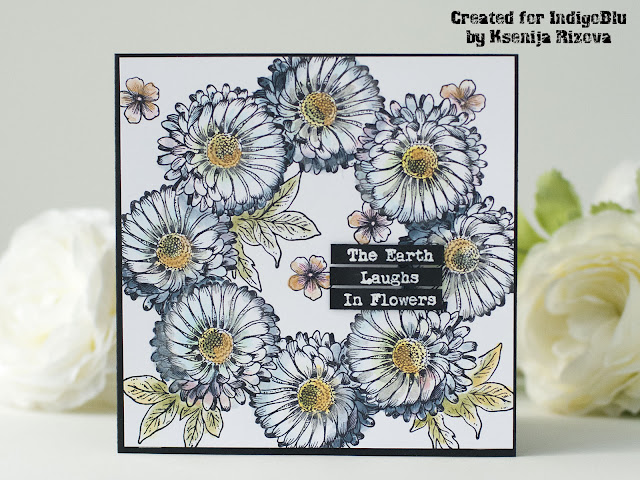
Today Ksenija is here and I am sharing a wreath card made with Marigold and Peony red rubber stamps set.
How to make a floral wreath card with individual stamps
Marigold and Peony stamps set is a part of the recent release from IndigoBlu and is perfect for making floral cards.

This set contains four individual stamps which are easy to use for building various floral designs. I would like to explain how to easily stamp a perfectly aligned floral wreath.
Building A Wreath with Individual Stamps
To stamp a symmetrical wreath of flowers you will need a square piece of a card stock, a stamp positioning tool, e.g. MISTI, and a masking paper.

How To Make This Card:


  • Place a square piece of a card stock in your stamp positioning tool in the lower left corner and position a flower stamp also in the lower left corner.
  • Stamp the flower down onto a paper in black watercolour friendly ink.
  • Rotate the card panel by 90 degrees counterclockwise and stamp the flower again.
  • Repeat this step twice and you will get four flowers stamped in each corner of the card panel aligned perfectly.
  • Stamp down the flower onto a piece of a masking paper twice and fussy cut out two masks.
  • Mask off two flowers onto a panel with the paper masks and place the panel into your stamp positioning tool.
  • Position a flower stamp between two masked off flower impressions and stamp it down onto the panel.
  • Reposition one of the masks to the third flower and rotate the panel within the stamping tool by 90 degrees counterclockwise and stamp the flower between two masked off flowers.
  • Repeat this step twice to get the full wreath of flowers.

Add shiny accents with IndigoBlu Luscious Pigment Powders
Masking is a great technique for adding details without paper layers. I replaced the masks several times and added leaves and smaller flowers impressions.

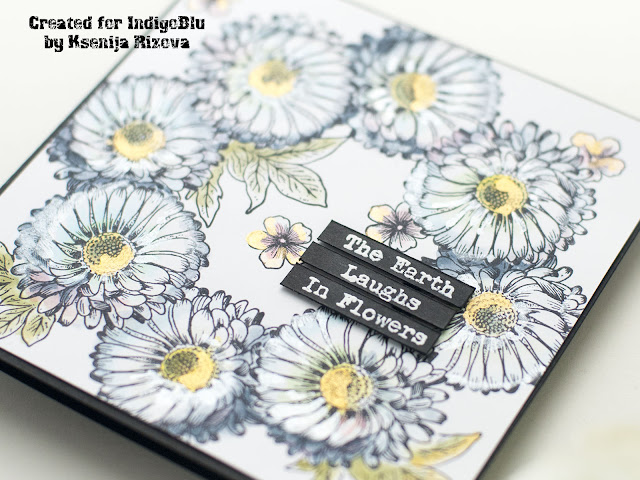
I coloured the wreath with watercolour markers and added accents with water diluted Luscious Pigment Powders in Gold and Silver.

To finish off my card I heat embossed the phrase from Floral Fantasy stamps set in fine white powder onto a piece of a black card stock and cut it into three thin stripes.

To assemble the card I adhered the stamped panel to a black card base and popped the sentiment stripes up with a foam tape.

Thank you for stopping by and have a great day!
IndigoBlu Supplies Used:
Marigold And Peony Red Rubber Stamps Set
Floral Fantasy Red Rubber Stamps Set
Gold Luscious Pigment Powder
Silver Luscious Pigment Powders

Tuesday, 17 April 2018

Hummingbird Card

Hummingbird Card

Hello, Kay M here to share a card I've made using the fabulous new stencils, stamps and Luscious powders that Kay launched on Hochanda last week. You still catch up with the shows if you missed them on Rewind on the Hochanda site.


The hummingbird stencil was used on coloured shrink film to make the cute embellishment. Posiedon and Teal Luscious powders were mixed separately with a little Slap-It-On Matt and sponged through the stencil. The beak was sponged with Fuzzy Pop and a little Slap-It-OnMatt. It was left to dry.


A little water and 2 drops of glycerine was worked into the the same sponge pad as for the hummingbird and worked over a 9.5cmx14.5cm rectangle of hot pressed watercolour paper. The Bubblewrap stamp was sprizted with water and repeated stamped over and dried. Faded Jeans Distress Oxide ink was 2nd and 3rd generation stamped with the Words stamp, and the edges sponged.


CherryLips and Unicorn Tears Luscious powders were mixed with Super ThickSlap-it-On and applied through the Cherry Blossom stencil over the background. When dry the background was adhered to the front of an A6 white card blank.


A sentiment from Think Evil Thoughts was stamped onto more watercolour paper, cut out and edged with the remaining Cherry Lips/Slap-It-On mix.
The hummingbird was cut out and shrunk, the edges drawn with a blue permanent marker. Then a mix of glossy Slap-It-On and Teal Luscious powder was painted over and dried. A gem was added for the eye.  


To finish, the words and hummingbird are attached to the card.

I do hope you have been inspired!

Thank Kay M x

Wednesday, 11 April 2018

Mixed Media Art Journal Page Inspiration with Mike Deakin

Hi Everyone,

It's my turn to share some inspiration with you today and I thought I'd create a whimsical mixed media art journal page using the new Collectors Edition No15 Stamp "Dorking Hen" and a few other fab IndigoBlu products (listed below)

When I saw the Dorking Hen I immediately thought of at least 6 ways to use the stamp, but all tongue in cheek!

Here's just one of them.


To watch a video on how I created the art journal page above, simply click the YouTube link below:

Here's a list of all the IndigoBlu products used in this projects
Watercolour Card Stock

Whatever you do today, make sure it's a creative one!


Thursday, 5 April 2018

Suffragettes 100 Years


Hi Jannet here today, it is 100 years since the suffragettes won some women in the UK the right to vote. I wanted to pay tribute to these brave women with this collage picture.


In 1908 the suffragettes choose the colour scheme of purple for loyalty and dignity, white for purity, and green for hope. I used the chipboard backing from a paper pad as my canvas. I brushed  it with Gesso, to give it a better surface for painting. After diagonally applying some masking tape, I painted Olive Waistcoat to the top left. While it was still wet I pressed crumpled up copy paper onto it. This left lots of crease marks and textures.  For the purple I mixed  Wimberry Pie with a dot of Stroke Of Midnight, and painted the remaining canvas as previously.When dry I removed the tape.


I added some colour to Elsie, and made her a hat with some wide green ribbon. I also wrapped her in a little purple shawl, fastened with a ”Votes For Women” brooch.


As part of the Suffragettes sustained campaign they smashed store windows. I wanted to somehow represent  this in the picture. I decided to use a square of Memory glass and adhered some torn pieces of  plastic around it, to try and give the look of smashing glass.


I used chipboard letters to spell out 100 Years, and painted them in  Pantry White followed by crackle glaze. 


This postcard is of The Holloway Banner which has the embroidered names of eighty Suffragettes who were on hunger strike in Holloway  Prison, London. I cut out  their names and put them on my picture along with a picture which I had  cut from a card “March of the woman” by Ethel Smyth. The cards and brooch are from the Museum of London who are holding a Suffragette exhibition.

This Picture Collage is dedicated with love, and gratitude to all of those very brave Suffragettes.