Monday 26 February 2018

The Draughtsman


Morning All,

Carolyn here with you today sharing a simple but effective card using The Draughtsman stamp set recently launched by Kay on Hochanda.


For this card I used Black and White card, Onyx Black Versafine and Stazon Cloudy Sky.


The main image of the Draughtsman was stamped onto white card using Versafine Black Onyx. I cut this to 75mm square and mounted it onto Black card. This was then trimmed to leave a 1mm black border.


The background was repeat stamped to cover a 110mm by 110mm square card using Stazon Cloudy Sky. This was also matt and layered onto Black card and trimmed to leave a 1mm border.


The card was made up by matt and layering the main image onto the background and then onto a 125mm square white card blank.


Thank you for joining me today and do pop back to see the fabulous inspiration from the team.

Carolyn
x


Sunday 25 February 2018

STAMP FOCUS | Bumblebee

Today Ksenija is here and I am sharing my tips how to easily make a spectacular card with Collector's Edition No. 9 - Bumblebee red rubber stamps set.
Stamp Focus - Bumblebee
Have you tried already new stamps from Collector's Edition?

Sunday 18 February 2018

Quick Card Share from Mike Deakin

Hi Everyone - Mike here with a couple of quick A6 card shares for you today using two of the fantastic new release stamp sets.
The first is the "Drive Fast" stamp set teamed up with the older but very versatile "Script" stamp set with some cogs and gears for decoration borrowed from the "Fly High" stamp set also featured in the card below. The backgrounds were created using "Vodka Martini" & "Kingfisher Blue" acrylic metallic paints applied by hand with a piece of "Phat Foam".
All images were stamped using Jet Black Archival Ink. The "Script" stamp was stamped in the background using "Sepia" Archival Ink.

They're very quick and simple one layer cards but with the metallic paints in the background, it gives them some real depth with that lovely metallic lustre shining from the back!

Hope you like them!


Friday 16 February 2018

Flower Power Tag

Hello and welcome,   Kay M here and it's my turn on the blog today, and I have a video to share with you on the IndigoBlu YouTube Channel.

This one uses the pretty Flower Power stamp with the small bees from the latest Collectors Edition stamps.

I do hope you enjoy the video and get inspired!

Take Care,  Kay M x


Monday 12 February 2018

Your Dreams

Hello Dear Reader,

How are you?
Today I have made this card for you.


I was started with several colors distress Ink, choose the one you like
and blend the paper.


With Versamark ink and clear embossing powder 
stamp the flowers and the stars from the Victorian Garden sheet


Stamp the  Jane Face in Gray and a second time with versamark.


Stamp with Versamark ink and white embossingpowder the sentiment.
Heat it very well.


Than take your distress Oxide ink Faded Jeans and Black Soot.
Make the paper blue and go over again with Black.
Go with a dry cloth over the ink and get it away from the embossed parts.


Stamp the Bumblebees on a scrap paper and ink with Wild Honey and Mustard Seed.
Stick with 3d foam on the card and finish your card on a white basic card. 


I hope, i have inspired you with my card. 
Thank you for leaving your message. 


Sunday 11 February 2018

New Stamp Release Sneaky Peek with Mike Deakin

Hi everyone Mike here again,

It's a privilege for my February Design Team inspiration to bring you a sneaky peek of three new stamp sets coming soon from IndigoBlu.

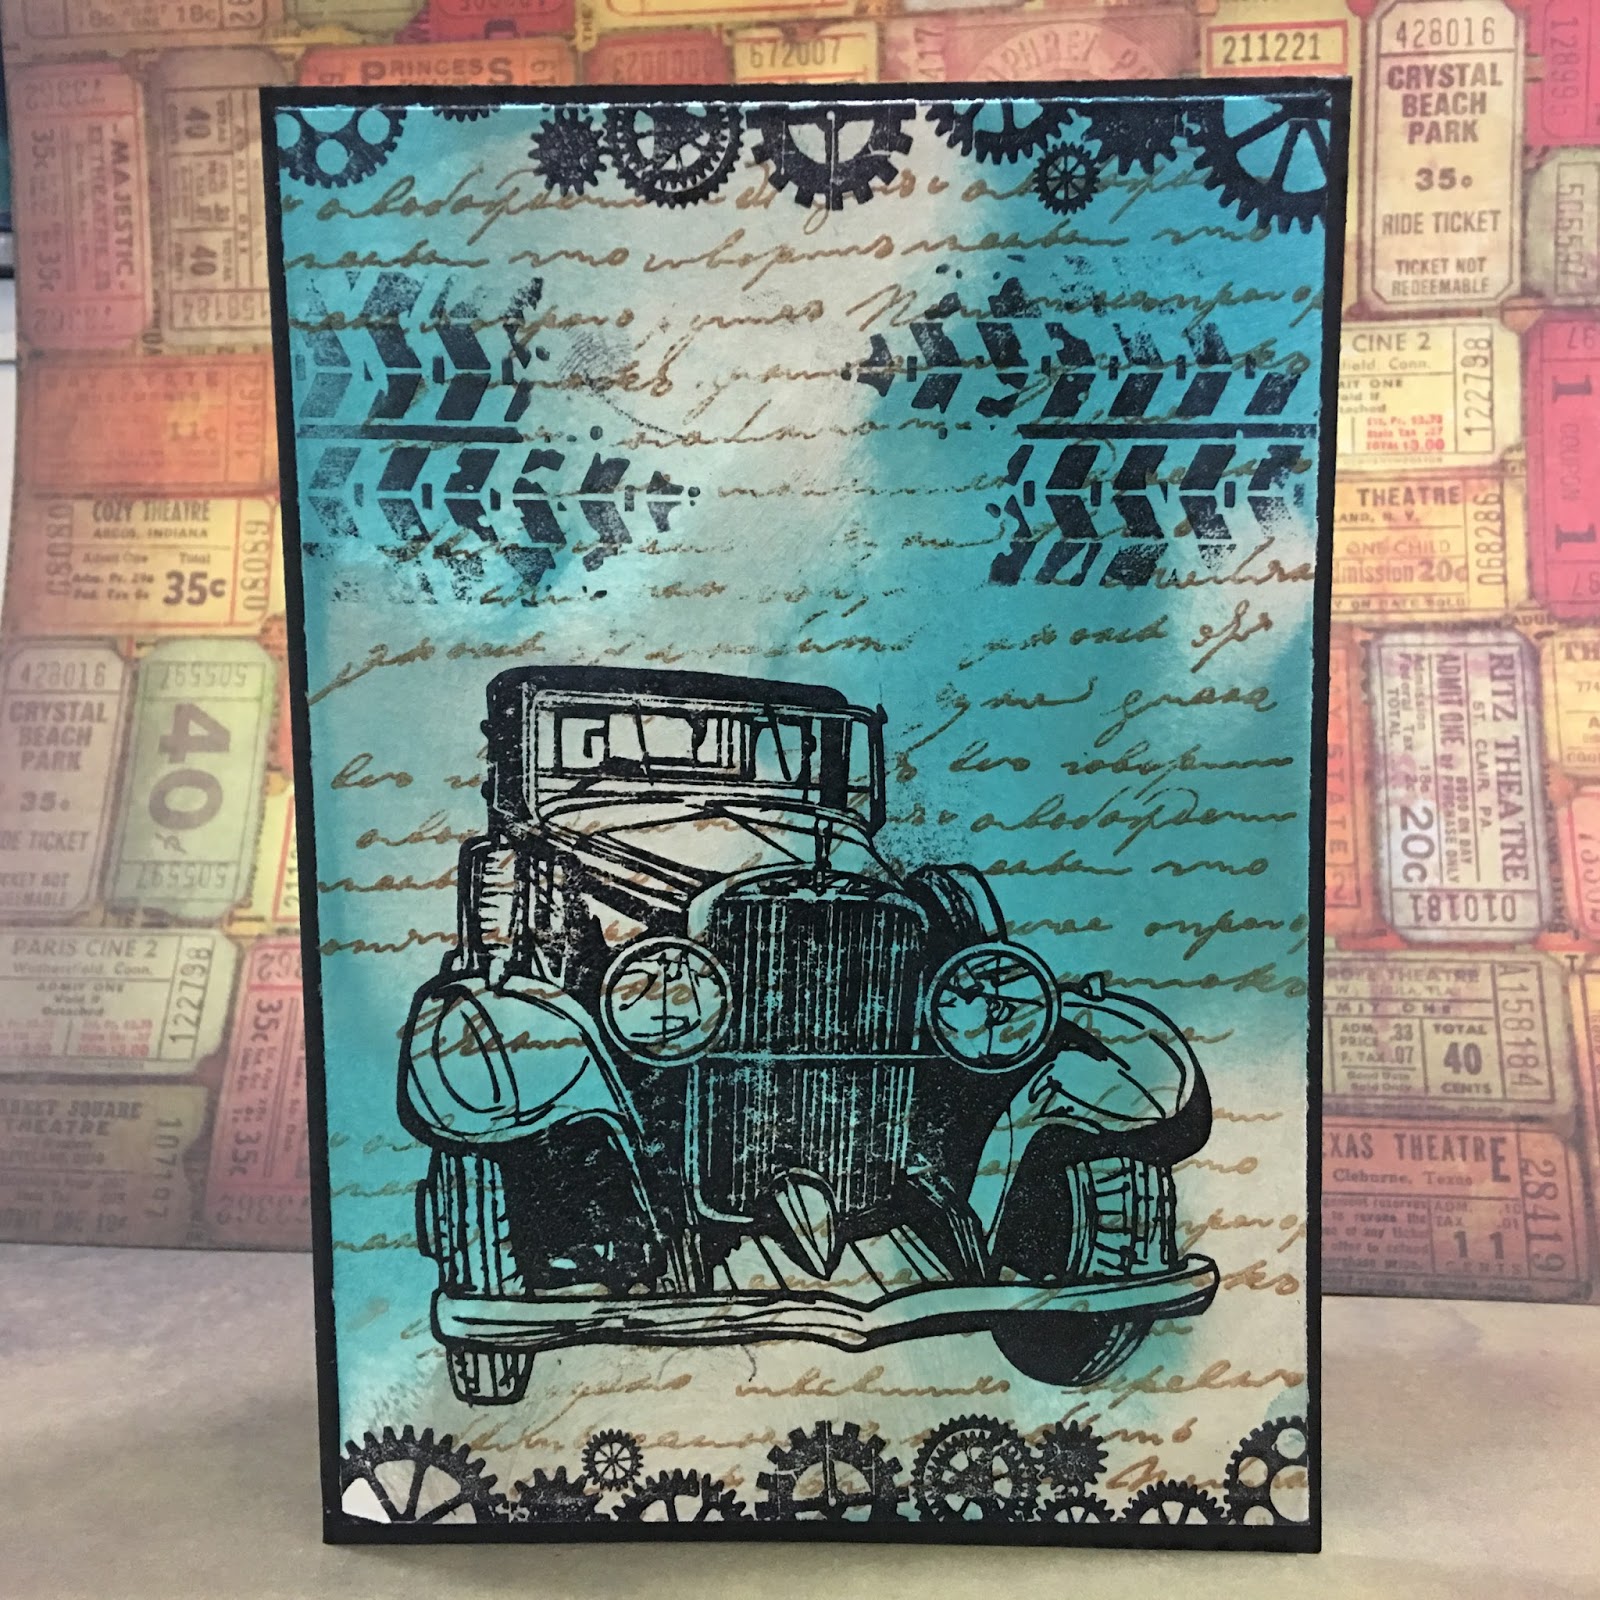
The 7" x7" card below was created using three existing neutral paints and three fantastic brand new stamp sets!


The three paint colours I used were:


I started off with my background and some small pieces of Phat Foam, loading up the paint into the foam with my spatula.
I then added the paint to my background cardstock with the foam to get the mottled effect - it almost looks like clouds (if you squint a bit that is!!).
Next using the Blueprint stamp from the brand new Draughtsman Stamp Set - I inked up the stamp, using Hot Cocoa paint instead of ink and then stamped all over the mottled sky.

I love the effect it gives! Next, I took a small piece of cardstock approx 2/12 inches by 2/12 inches and did the same thing with the background except I didn't use the Blueprint stamp. Instead, I used the new Victorian Gentleman stamp from the same set and some Coffee Archival Ink and stamped the image onto the small piece of cardstock. 

Doesn't he look just like a photograph! It's magic!!
I then matted this onto a piece of the same cardstock as my 7x7 base card. 

I then did the same thing with one of the Aeroplane stamps from the new "Fly High" stamp set.
Next, I did the same thing with one of the tags from my Junk & Disorderly art journal to create the same effect on the background. The Phat Foam was still juicy and hadn't yet dried up!
Finishing off with one of the typography stamp sets from the brand new "Traveling Home" stamp set with the same Coffee Archival Ink.
To finish off ,I glued the background onto my card base, then glued the Victorian gentleman and aeroplane piece onto the background...

...then mounted the tag with some double-sided foam tape for a bit of dimension - after adding a piece of coffee coloured seam binding to the tag! - Job Done!

I hope you enjoyed this sneak peek at some of the fantastic brand new stamps sets that will soon be available to purchase from IndigoBlu.


Monday 5 February 2018

Love Letters


February is synonymous with Love, so I thought I would begin the month by spelling it out! 

I already had the “L”, “V", and “E”, wooden letters in my stash, but I didn’t have an “O” ! Luckily I was able to find a papier-mâché “O” it was a little larger than the other letters, but I crossed my fingers that it would work out ok.  


I painted the “L” and “V” with Grandmas Teacup paint, and outlined them using Poseidon Blue Luscious  which I had premixed with a little water.

I took some time deciding which stamps to use and I eventually decided that a nature theme would be nice using butterflies, flowers, birds etc. I stamped using a Versamarker ink pad and heat embossed the images in white.


                      Anemone and Daisy
                              Wild Poppy


I also embossed some butterflies onto card, and coloured them with the Indigoblu paints before fussy cutting them. I folded two of them in half, and stuck the folded sides together using sticky pads and adhered them onto the letters to look as if that had just landed onto them. I also laid one butterfly flat onto the "O" and "V" letters using pva glue.


I painted the “O ”and “E“ with Iced Gem paint, and outlined them using Pink Luscious which I had mixed with a little water.

I repeated the stamping and embossing as above, but also added the darling robin to the “O”, and fussy cut lots of the little flowers from the Wild Poppy set to add to the "E".


Wishing you a lovely Valentines Day, at least us crafters can always create our own flowers to give ourselves on the day !